I was playing around with a few of the products from the MAC Spring Color Forecast collection and here is the outcome:
Here I used one of the new pigments (desribed below) on the lid, the new Nanogold eyeshadow very lightly on my browbone, and Bronze eyeshadow (permanent shade, not from this release) in the crease.
On my eyes I used the Crushed Metal Pigment: Stack 2! I used the gold color, which is the one that is open in the picture below:

I love the gold but I also think the champagne colors are absolutely gorgeous! The green one is nice too, though I won't use that as often. These are really neat because you get 4 colors packed in one. You can mix and match how you want to organize them, either as 2 and 2, 3 and 1, or even all 4 together:

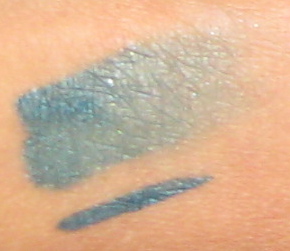
Here is a swatch of all the colors. The first pic is blurry, but shows the colors better, so I decided to include it anyways.


Pictures don't do these justice. They are more shimmery in real life and very pigmented. The product itself is a mix between the chunky solar bits and the regular pigments. As you can see in the pic, they aren't as chunky as the solar bits, so they are easier to work with, but you still have to kind of crush them before you apply to the skin. I loved the colors and the fact that you can use them for a variety of uses, so I personally would recommend this stack. However, if you don't like spending time with a product to make it work, then these aren't for you. For me, it just adds to the artsy part of doing my makeup.

I also played around with the Blush Ombre in Ripe Peach. Let me just say that I LOVE this product. I love blushers and this one is so gorgeous! The powder is so finely milled and it applies so smoothly. It stays on for several hours, which is a plus since blush is usually the first to fade. The product itself blends soooo smoothly, more so than MAC's normal powder blushes. I am even tempted to go get the pink one now. The brown neutral one would make a great bronzer, but I don't use bronzer as much so I might pass on that.
You can use the different parts of the blush to get the individual color, or you can swirl the color to get a combo. The swatches in the pic below go in the following order from left to right: all colors swirled together, the center of the blush, the dark pink side, and the light gold side.

This blush gives such a gorgeous, healthy, coral glow. In the pic below I used the colors swirled together:
 You can't see very well, but I am wearing "O" lipstick with Love Nectar lustreglass (my favorite) on top. I have also been trying out a new skin product mixed with my foundation...and so far I like it. Will tell you more about that soon.
What do you think about the new collection? What are you planning to get, if anything?