Showing posts with label how-to. Show all posts

Wednesday, April 18, 2012

How to Repurpose a Candle Jar for Makeup Storage

Due to my love of Bath and Body Works Slatkin & Co. Candles I have ended up with a lot of used candle jars, which I have repurposed and used for cosmetic storage. Here are a couple candles I used up during the winter holiday season and the process I use for removing the wax. 


1. Put the glass jar with the wax in the freezer for at least 1.5 hours. When you are ready to begin the wax removal process remove the jar from the freezer.


2. Take a butter knife and gently insert it into the wax. The wax will start cracking. 


3. Once the wax starts cracking, remove each piece.


4. Keep cracking the wax until all the wax is in pieces and can be removed from the jar. 


5. If the wicks are glued to the jar of the candle, slowly use the same butter knife to lift each wick and separate the glue.  


6. Remove each wick and as much of the glue and wax residue as you can.


7. Fill a small pot with about 1-2 inches of water and heat it up until the water is about to boil. Turn off the heat and put the glass jar in the water. 


8. The heat from the water will melt the wax/glue residue and you should be able to wipe it off with a paper towel or cloth. Remove as much as you can.


9. The heat from the water will also loosen the glue from any labels on the jar, so this is a good time to remove all labels. 


10. Wash the jar with dish soap and/or put it in the dishwasher. Once the jar is clean, if there are any small amounts of glue remaining, try soaking the jar in soap and water, or use a product like Goof Off to easily remove the glue. Once the jar is completely clean, you are ready to use it for storage!


These jars are the perfect height for Q-tips, so I put a piece of cardboard in mine to act as a divider and I used half for Q-tips and half for cotton balls. You can use these for storing soaps, lipsticks, liners, makeup brushes or whatever your heart desires. Happy organizing!

Thursday, January 19, 2012

How to Prevent Eyeshadow Fallout

Ladies, you know how frustrating eyeshadow fallout can be. You finish your eye makeup only to look down at your cheeks to find traces of eyeshadow just sitting there glaring at you. And most often than not, this happens to me on days when I do my foundation first then my eye makeup, AND I am running late for an event.

Hopefully, these next few tips will help prevent that nasty fallout in the future:

1. Do your eye makeup first, then do your face makeup. That way, if you have to clean up any fallout, you can do so on clean skin and won't have to rub off and reapply foundation, concealer, poweder, etc.

2. When using brushes to apply eye makeup, swirl your brush in the shadow, then tap the handle against your hand to let the loose, excess product fall off the brush on your hand instead of on your face. I do this with almost all powder products (blush, powder, etc.) so that excess product does clump in one are of the skin or fall all over the place.

Brush right after swiping in shadow

Tapping brush on back of hand

Brush after tapping - all excess shadow has fallen off

3. Try using your finger to apply eyeshadow. When picking up product with your finger, excess product will not adhere to your finger, so you don't have to worry about that product falling out on your face. Of course, ALWAYS use your ring finger, as it is the most delicate on your skin, and ALWAYS wash your hands before and after.

Finger swiped in shadow

4. Try using a shadow shield. I picked these up at Sephora a few months ago, but I think similar products are available at other retailers as well. They work pretty well, but are somewhat annoying because there is an adhesive part on one side of the shadow shield and it is annoying to peel off. Plus, this can get pretty expensive if you use them everyday, but might be worth it when doing bright eye makeup or super heavy shadowing.


Wednesday, December 14, 2011

How to Press Loose Pigments

Hello!!! Yes, it has been way too long since I have posted. Life has been crazy between work, holiday parties, holiday planning, family events, and trying to spend quality time with the hubby.

Ok, I admit, I also spent quite a few nights watching sappy Christmas movies on the Hallmark Channel and Lifetime. What can I say? I love them! I love the holidays and I love romantic comedy movies, so it's the best of both worlds!

Anyhow, I recently did an experiment in pressing a loose pigment in to an empty shadow pan. I had heard about this being done and I wanted to try it for myself. I used regular rubbing alcohol (Isopropyl Alcohol 70%), the pigment, an empty shadow pan (this was an old MAC shadow I finished so I cleaned out the pan), a spatula (a toothpick is a good substitute), and a paper towel on the surface.


Step 1: Pour a little bit of the pigment in to the shadow pan.

Step 2: Pour a small amount of the alcohol into the cap of the alcohol bottle, and then pour from the cap in to the shadow pan. Mix the pigment powder and the alcohol with the spatula.


Step 3: I accidentally poured too much alcohol in the pan so I ended up taking a small piece of paper towel and dipped the corner in to the pan to absorb some of the alcohol.

Sunday, October 30, 2011

My Halloween Devil Look

I don't like Halloween.

There, I said it.

I know most beauty fanatics love this spooky holiday because it gives them the freedom to go cra-zay with makeup, and don't get me wrong, I like that too, but I hate the build-up around Halloween parties. Everyone always has such high expectations over Halloween party and inevitably, the party ends up being just ok. I did go to one really good Halloween party last year, and I think it was great because we didn't have any expectations and it was at my cousin's house so I was just excited to see my cousins.

In any case, I did end up going to a Halloween party this weekend and I wore my standard issue devil costume. This year I decided to do more of a beauty look with a little funky twist. 

Wednesday, May 18, 2011

Making a Customized Lip Palette

I'm on a roll with space saving ways to condense my makeup collection. First it was de-poting, now its de-tubing. Lipstick, that is!

Call it spring cleaning for your makeup drawer. Call it learning to fit things in small spaces. Or call it "I just happened to find this at my local Sephora so I just had to tell you about it!"


This is the Sephora Lipstick Palette Kit. It's no longer available online, but I found mine in the sale bin at my local Sephora. It includes an empty 8-well lipcolor palette, a lipstick melting bowl, and a spatula. Create-your-own lipstick palettes are great for making a customized palette with your favorite shades so you can easily access your favorite shades in one palette rather than search all over for tubes of lipstick. These palettes are also great for travel so you can carry multiple lip colors without it taking tons of space. The reason I picked this up is because I have a few lipsticks coming to their end and I wanted to dig out and use the last remains of the lipstick and toss the tube. 

This Sephora palette itself is pretty small...just slightly bigger than a credit card. It also includes a small lip brush.


So how do you actually get from tube to palette? I started by digging out lipstick from a tube that seemed to be finished, but I knew there was still lipstick beyond the little plastic edge. As you can see, I dug out almost 1cm of product!


I scooped the product out with the spatula that came in this kit and put it in the melting bowl/


Per the directions that came with this kit, I microwaved the lipstick for 1 minute so it was completely melted.


I then poured the lipstick in to the palette, scraping the palette with the spatula. You are supposed to do this immediately after melting the lipstick, so the lipstick doesn't solidify, so I wasn't able to capture an image of the pouring action, but you can see when the bowl looks like with the product scraped out.


The amount of lipstick I saved filled almost two wells in the palette! The top well was neat, but by the time I started pouring the bottom well I was trying to pour and scrape at the same time so it didn't fill up as neatly. 


Now I can easily use up the lipstick product that would normally be trashed. Although I am not the biggest fan of lip palettes because they can be messy, this is certainly better than digging the lipstick out of the seemingly empty tube and this palette is convenient to use. 

Have you ever de-tubed your lipstick? 

Monday, May 16, 2011

Makeup Tip Monday: How to Depot Shadows and Blushes

Ladies, this is a big one. Despite the other depotting tutorials already out there in cyberland, in the past some readers have requested to know my method, so why not tell all of you!?!

(Warning, this post is photo-heavy.)

So here is a basic MAC eyeshadow in the normal pot:


I open the lid and shove thin tweezers between the little crack that holds the black plastic holding the pan of the shadow and the base of the pot. This will allow the black plastic pan to pop out:


Here is what it should look like with the black plastic pan holding the shadow popped out:


I then light a candle. Holding the black plastic with tweezers, I put the shadow over the flame to start melting a tiny hole in the black plastic. Be careful with this since you don't want to burn everything and end up ruining the shadow or burning yourself. I also recommend doing this by an open window because the plastic burning smell can be quite yucky.


Here you can see that the center of the black plastic has started to melt. The plastic has not melted all the way through, but it is quite soft.


I immediately take a semi-sharp object like a ball-point pen and press it on the melted spot to help push the metal eyeshadow pan out of the plastic. I try not to melt too much of the plastic, so if the shadow pan doesn't pop out right away, I try melting more plastic until I can pop the shadow pan out. Also, I usually lay a soft towel down while doing this so that when shadow pan comes out, it will hit a soft surface and not break.


The metal pan holding the shadow should start to come out of the plastic. At this point I lift the metal pan out of the plastic with my fingers. 


Here is the shadow pan popped out of the plastic. The shadow is face down. Note the sticky glue on the bottom of the metal pan.


While the glue is still sticky, I like to remove the shadow label paper from the bottom of the shadow container so I can attach it to a magnet and attach the magnet to the sticky glue on the metal pan. In order to loosen the paper label, I hold the shadow container a couple inches above the candle flame for a few seconds. The heat will loosen the glue that holds the label on to the plastic container.


Once the label is a little warm, it should peel right off.


I then stick the label on a magnet.


I usually trim the magnet label in to a square that is smaller than the metal shadow pan. I have found that when I use a magnet the whole size of the metal pan the magnet is large and has so much magnetic power that it becomes hard to remove from a pallete.


Here is the final shadow pan. Pretty close to the shadow pans you can just buy from MAC, right?


Finally, I pop the little plastic piece that held the metal shadow pan back into the shadow container. Why? So I can Back-to-MAC it of course!


There it is! Hopefully you find this helpful!

Wednesday, July 21, 2010

Parian Spirit Brush Cleaner Review

At IMATS, I picked up the Parian Spirit Brush Cleaner. This high performance brush cleanser is targeted towards makeup artists, but I think it is the best brush cleanser for makeup newbies and pros alike. I got a large bottle of the cleanser (not pictured) , a small travel size spray bottle, a few handy cleanser wipes, and the cleansing tub:


The formula of the cleanser itself is amazing. It cleans and disinfects in a matter of a couple minutes, and it contains alcohol so the brushes dry very quickly and can be used almost immediately after cleansing. Here is the pamphlet that explains more about the cleanser and the recommended methods for cleaning and disinfecting brushes. If you click on the image below you can view a larger, more readable version.


The mini spray bottle is great for on the go, because you can spray the cleanser directly on the brushes and wipe them clean. The wipes are also handy as you can simply swipe your brushes across the wipe. However, the method that is most effective and recommended is using the cleansing tub. The tub is like a jar and it comes empty without any solution. It has a ring at the bottom with a plastic grate on top. The idea behind this is that the grate is raised about half a centimeter above the bottom of the jar, and when you clean your brush in the jar, makeup and dirt are removed from the brush, fall below the grate, and settle to the bottom. That way, the fluid above the grate is still clean and can be used to clean more brushes. This is the jar empty:


After pouring in some solution (I usually pour enough so there is a centimeter of cleanser above the grate), simply take a dirty brush and dip it in the solution for a couple minutes. Swish the bristles around and rub them against the grate to help loosen makeup particles. 


In a matter of seconds the brush is clean:

Monday, July 12, 2010

Deepika Padukone Makeup Breakdown

One of my family friends in India is pretty well connected and was telling me how Bollywood actress Deepika Padukone is a desi (Indian) girl next door. She eats real food and actually gets hungry, she doesn't spend every last waking second at the gym, and she is pretty down-to-earth. And another thing, she has natural beauty. A lot of actresses rely on the magic that is makeup in order to keep up their image. Deepika looks great even bare-faced.

That inspired me to read a bit more about Deepika Padukone and in doing so, I came across some photos of her from the Cannes Film Festival this year.


She definitely has a hot body, but I think her hair and makeup are absolutely gorgeous:


Her makeup is simple yet elegant, and is appropriate for everyday and a fancy event. Here is how to create the makeup:

Tuesday, March 9, 2010

Highlighting Part 3 - Best Brushes for Highlighting the Face

In the last couple weeks I told you about some of my favorite highlighters, then highlighting techniques, and now in the last part of my highlighting series, I am going to tell you about some of my favorite brushes for highlighting:


Before I get started, this is not an end-all be-all of what you can use to highlight, these are just the brushes I tend to reach for. And yes, I use mostly MAC, but feel free to use whatever you have or want.


This first one is the MAC 138. I really love this brush for powder because the pointed tip really gets into small areas like under the eyes and around the nose. However, this brush is also great for highlighting. It doesn't pick up too much color so it is easy to control the amount of product you apply and you won't end up looking glittery. Because of the tapered shape, I like to roll half the bristles once in a powder highlighter and then roll it against the skin. This technique is best for highlighting above the cheekbones and the temples. This is a larger brush and can be used for highlighting smaller areas like the nose, but it takes a little more control and practice so you don't get the highlight product all over the place.


This next brush is the MAC 165 and is like a smaller version of the MAC 138. I belive this was a limited edition brush, but it seems like MAC releases it about once a year with a limtied collection. You can use this brush in a similar manner as described for the 138 or you can use to to just sweep the product on the skin. It has shorter bristles and the diameter is smaller, so you don't have to worry about getting the product all over the place. This brush works great for both powder and emollient based products.


This next brush has so many great uses and I think everyone should have one. It is the MAC 188, or a skunk brush. This is a smaller version of the MAC 187. Because of the duo-fibers, this brush always picks up the perfect amount of product and allows you to blend flawlessly into the skin. I either brush this against powder highlighters and apply to the skin, or apply cream/liquid highlighters with my fingers, and use this brush to blend the product into the skin. This is great especially for beginners because it does not pick up too much product, and is great for everywhere, because it has so many uses. In addition to highlighting, I use this for cream or powder blushes and sometimes for foundation.


This next one is a brush I constantly rave about and is the MAC 109. I used this for EVERYTHING. I especially love it for liquid foundation, powders, and for contouring. However, I do use it for highlighting the cheekbones too. It has densely packed bristles so you have to be cautious with powder highlighters, because you can pick up too much product. In a hurry, I will swipe this on a powder product, them apply to the cheekbones, and take whatever is remaining on the bristles and swipe against the bridge of the nose. Again, less is more with highlighters, and you don't want to be the white version of Rudolph.


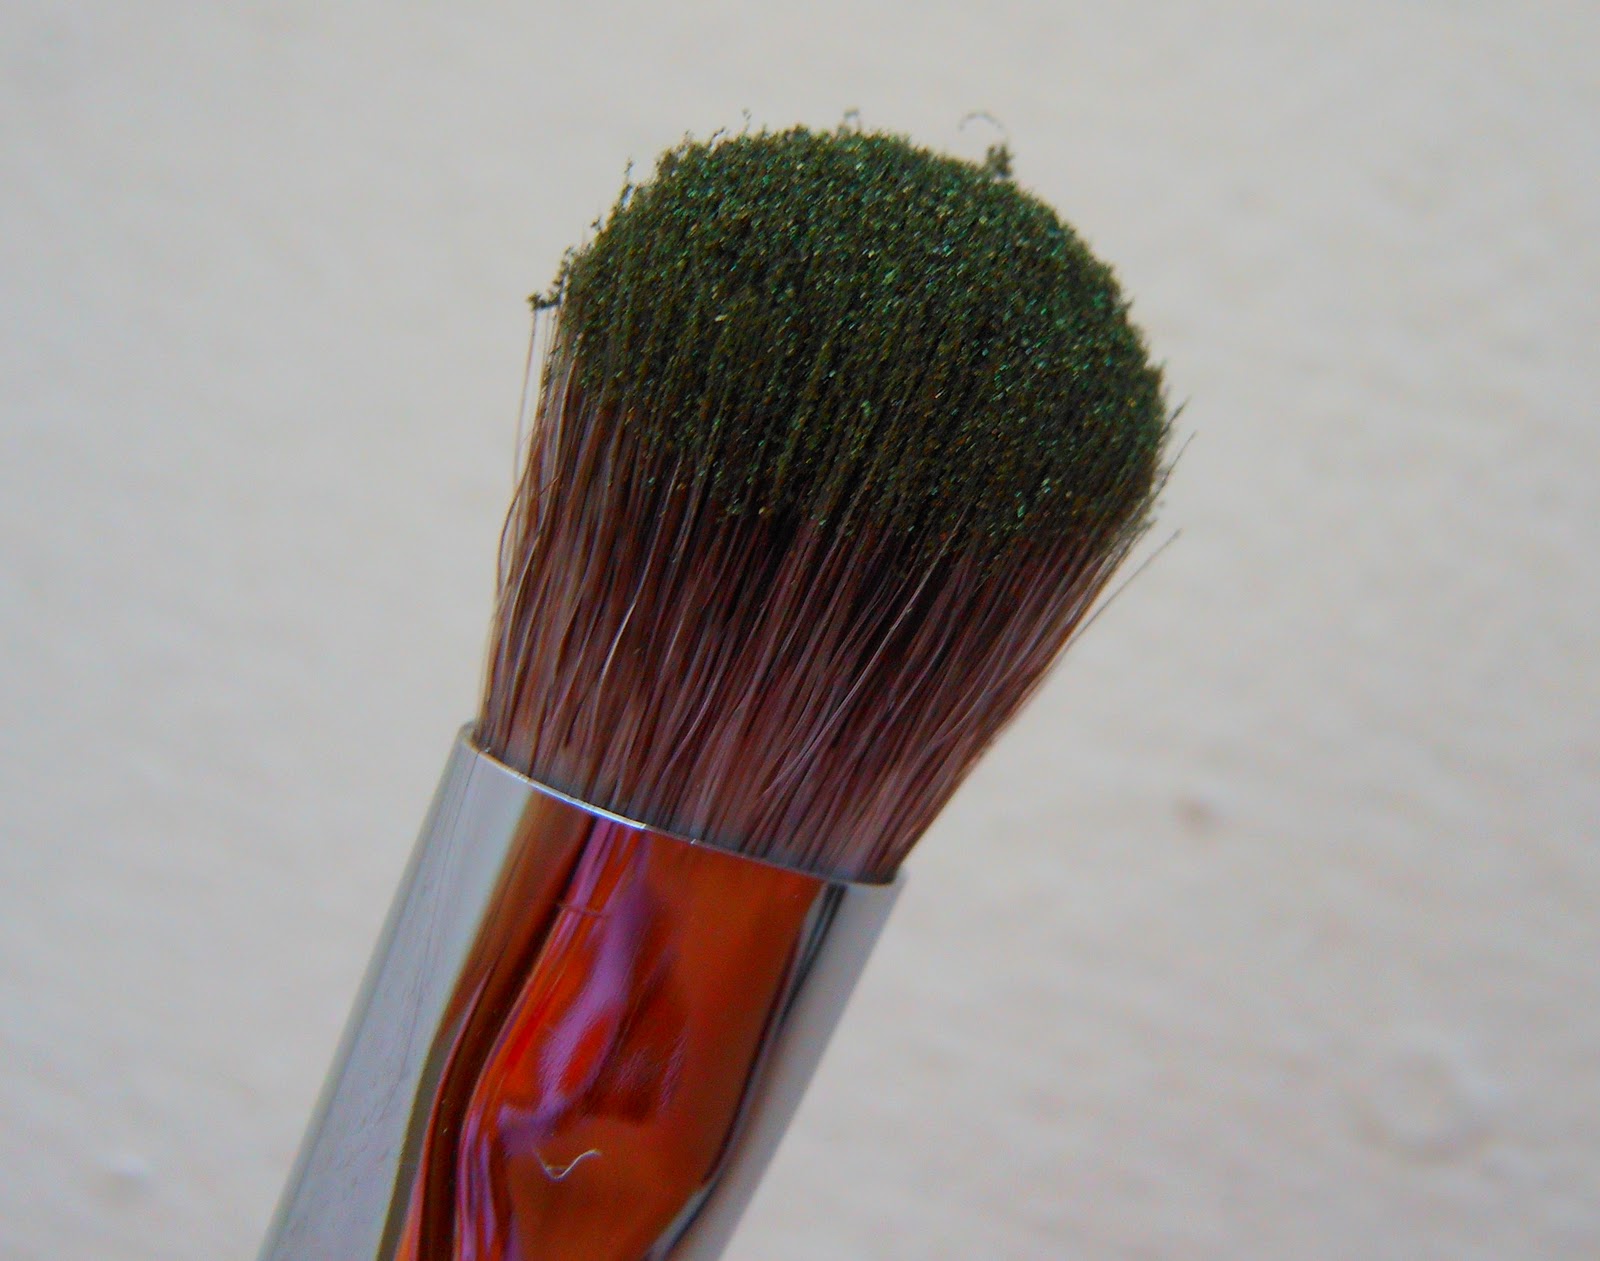
Lastly, I use crease brushes for detailed highlighting, like under the browbone, the chin, and the cupids bow, but I really like using them for the temples. The one pictured here is one of my new favorites, the Stila #9 brush. I typically use this with a loose powder highlighter, but you have to be careful not to pick up too much product. Since it is smaller than all the other brushes, you have more precise control of where to apply the product. Crease brushes are also great for blending, and give a nice soft look.

Overall, highlighting takes a bit of practice and is easily a step that can be skipped for daily makeup application, but really adds a nice touch for special occasions, especially if you are going out in the evening or will be in dimly-lit spaces. Based on the curvatures of your face, figure out what looks best on you and have fun with it!

LinkWithin

Related Posts with Thumbnails