Showing posts with label Brushes. Show all posts

Thursday, September 15, 2011

Smashbox Luxe Metallics Glambox Swatches and Review

Smashbox does it again! Remember how much I loved the Smashbox Studio Stash set? I may have found another set I like even more! The Smashbox Luxe Metallics Glambox!! Smashbox releases a glambox set a couple times a year and they literally come in a cubed box:


This Luxe Metallics Glambox has 7 products in it:

- Fusion Soft Lights in Luster
- Blush Rush in Surge
- Eyelights Quad in Luxe
- Full Exposure Mascara Mini in Jet Black (the one pictured above is the full size because I misplaced the mini one that came with this set)
- Jet Set Waterprrof Eye Liner in Vamp
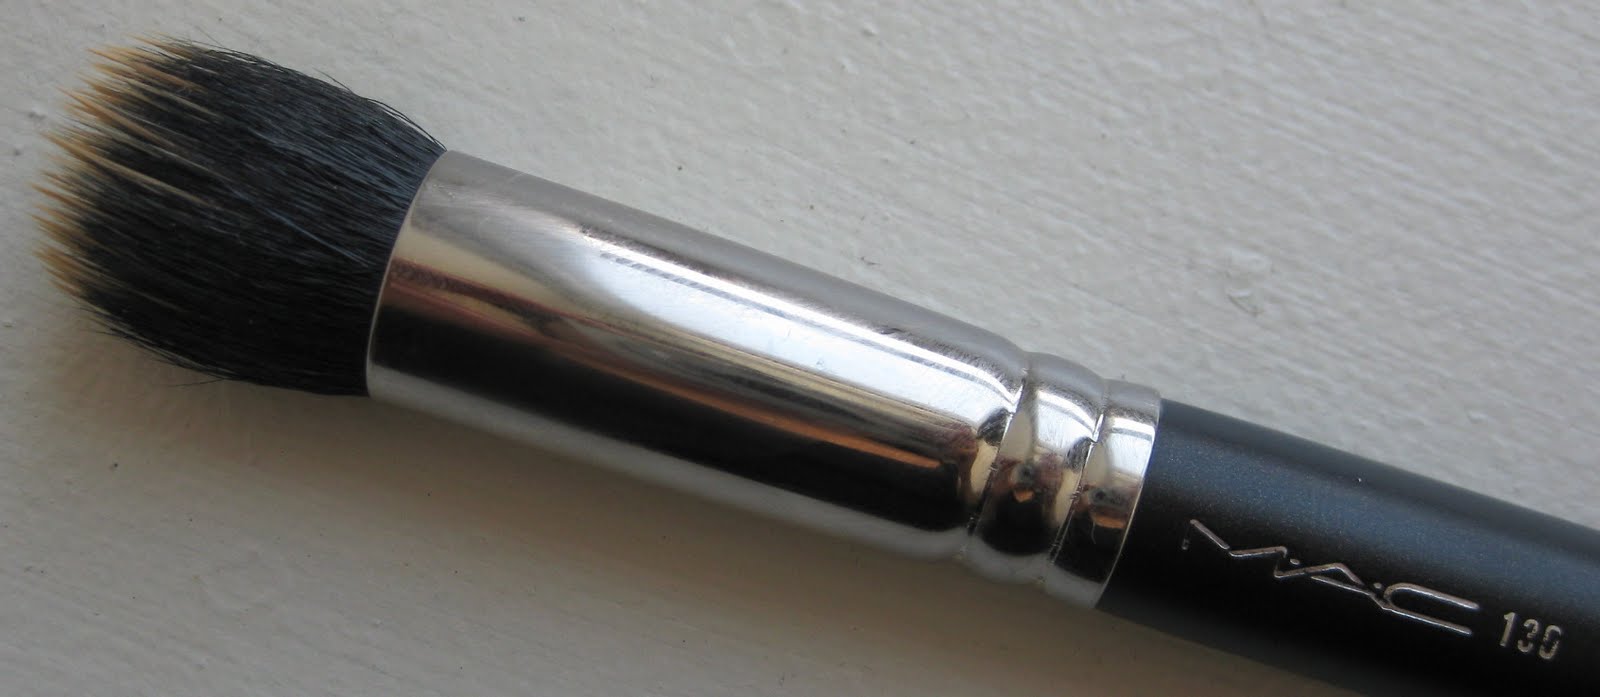
- Arced Liner Brush #21 (full size)
- Lip Enhancing Gloss in Gilded Nude
- Lip Enhancing Gloss in Rose Quartz

 Fusion Soft Lights in Luster and Blush Rush in Surge

L-R: Surge blush, Luster Fusion Soft Lights (the 3 individual shades, then all swirled) 

Eyelights Quad in Luxe and Full Exposure Mascara 

Eyelights Quad in Luxe

 
Jet Set Waterprrof Eye Liner in Vamp and Arced Liner Brush #21

Lip Enhancing Gloss in Gilded Nude and Rose Quartz

L-R: Jet Set Waterprrof Eye Liner in Vamp, Gilded Nude gloss and Rose Quartz gloss

The kit also includes a pamphlet with instructions on how to create a Bronze Glow look and a Metallic Smoke look:


My fave of the two looks is the Metallic Smoke look, so I tried that look first. I followed the instructions exactly, using only my own foundation, concealer, and brushes.


What I was most excited about in this kit was the Arced Liner Brush #21. I have been wanting a bent liner brush like this for a long time. I have only used it a few times but so far I like it. It is SO much easier to use than a regular liner brush that has a similar brush head but is not bent. However, since I have been using an angled brush (the MAC 208 is my fave) to apply gel/cream liner for many years, this is going to take some getting used to. I was also excited to try out the Blush Rush formula. I was a bit hesitant of the color because it appeared so bright on my hand, but when blended well, it adds a soft pink flush to the cheeks. 

Overall I really like this kit and will be using these products a lot, especially as Fall and the holiday season approach. Speaking of, this would make a great Christmas present! Or if you are like me and have no patience, a great anytime present to yourself! =)

Disclaimer: The products in this post were provided by PR for consideration. Please read my disclaimer for additional information.

Wednesday, August 3, 2011

July Favorites

Last month was all about quick and easy-to-use products because I was so busy and most frequently opted for a simple look rather than a complicated, full face of makeup. Here are the products I kept reaching for:

1. MAC Lipstick in See Sheer - This is the perfect wearable coral lipstick for me. I can wear it with neutral eye looks for a subtle pop of color, or with a smoky eye because it adds a bit of fun to the lips without being in-your-face.


2. MAC Pro Longwear Foundation - I have talked about this a lot before but I continue to love it because it is so easy to wear! It provides medium coverage, blends easily, has a bit of SPF and lasts ALL day long! Who really wants to reapply foundation in the summeritme? Not me. 


3. MAC 130 brush - I have been using this brush every single day. I use it with all formula foundations, even the Pro Long Wear mentioned above. It blends foundation so easily and buffs it in to the skin so your skin looks clean and neat...not cakey. This can also be used with cream blushes and concealers. 


4. Sephora Airbrush Concealer Brush - Another brush I have been using every day. I got this in the Sephora Airbrush Set, which I like, but this is my favorite of the bunch. It does seem kind of big but it so perfect for blending concealer under the eyes. 


5. Bobbi Brown Long Wear Shadow in Beach Bronze - This is just so perfect for summer! I wear it alone as a sheer wash on the lid. It has a bit of sparkle in it so it has some dimension when the light/sun hits it. And not to mention it is just so easy to dab a bit on my finger, swipe it over my lid, and go! 


L-R: Beach Bronze swiped and blended

What are you easy go-to items for summertime?

Tuesday, July 5, 2011

The MAC 234 and 235 Split Fiber Brushes Are Making Me Do The Splitz!

Hey all! I have been waiting a LOOONG time for the MAC Semi Precious collection and I have been jumping for joy that it is finally here! Why? Because I go cra-zay for brushes and there are a whopping 4 new MAC brushes released with this collection! Today I am reviewing the 2 eye brushes: the MAC 234 and 235 split fibre brushes. First up is the 234 Split Fibre Eye Blending Brush:


As you can see, the fibres are really split in half, one side having natural hairs (the black side) and the other side having synthetic hairs (the white side):


This brush is very similar in size to the 217 eye blending brush, in that the hairs are about the same length, and the base of the bristles are somewhat flattened, not perfectly round like the 224 brush. The 217 is also more rounded at the top:

View from the side:
Top: 217 brush (yes, it's dirty...but it was the only one I had out)
Bottom: 234 brush

 View from the top:
Top: 217 brush
Bottom: 234 brush

 My overall view of the split-fibre brushes is that they are great if you have a tendency to layer powder products over cream products. Natural hair bristles are best for powder products and synthetic hair bristles are better for cream and liquid products. In my opinion, the synthetic hair side of the 234 brush is great for applying concealer under the eye, and the natural hair side is great for setting the concealer with powder. Instead of using two different brushes, you can achieve two different product applications with just one brush. The same can be said about eyeshadow. I like to use a synthetic hair brush for applying eye primers, and then a natural hair brush for applying powder shadow. Instead of using two brushes, I could use one split fibre brush. I really like the new 234 split fibre brush for this purpose:


The 235 brush has been used everyday since I got it. I use the synthetic hair side to apply my paint pots and I use the natural hair side to apply powder shadow on my lid and on my browbone. However, I can't use the 235 to place small amounts of shadow to small places, because it is quite a large brush.

 View from the top:
Top: 239 brush
Bottom: 235 brush 

View from the side:
Top: 239 brush
Bottom: 235 brush 

With the 235, I still need to use a smaller brush to apply shadow to the crease and outer corner. However, I do like not having to use a completely separate brush for my paint pots/eye primer.

Some people are saying that the split fibre brushes are a gimmick, but I really find them to be useful. They have the same high-quality workmanship as MAC's permanent brushes, and they do retain their shape and softness after washing. Although these brushes were released as part of a mineralized collection, I am not sure if they apply mineral products any better because I don't use too many mineral eye products and I haven't tried the split fibre face brushes yet. In any case, I really like these new eye brushes and they will definitely get a lot of use from me. 

What's your opinion of the new split fibre brushes?

Monday, November 15, 2010

Stop Bagging On MAC Bags (Brush Sets That Is)

Every holiday season MAC releases brush sets, and every holiday season you hear bloggers saying not to buy them because the quality is not as good as the regular brushes. Well, I have nothing against those bloggers, but seriously, the brush sets are not as bad as people make them out to be. In fact, if the brush combo is right, the brush sets are GREAT!!

The brush hairs in full size and the sets are the same, the only difference is the full size are man made, and the sets are machine made.

The first negative I always hear is the brushes are scratchy. When machine made, there is a little more room for error, so some bristles might go in backwards. With face brushes, if a few bristles are in backwards, it won't make a difference, but with eye brushes, that can affect the feel.


I have both version of the 187 brush and I love them both! I can't tell a difference in feel or performance. And if you look close enough, you will notice there are more backwards bristles in the full size brush! I actually use the small set brush more because I like the short handle, so the bristles have spread out a bit more, but that is purely due the amount of use. The face brushes, which are most expensive, make the sets a great value and the quality is pretty much the same as full size!


With this 239 shadow brush, there is a slight difference in width, but nothing that affects the performance of the brush. There is only one type of bristle and since there is very little tapering at the sides, a backwards bristle won't affect the performance. From the side the thickness is pretty much the same:


Now the only time I think the set brushes are not good are when it comes to small eye brushes that are tapered, like the pencil brush or the angled brush:


This one is a 266 brush and it is useless. The bristles have started shedding and coming out and the tapering is not even. 

Ladies, if you want the brush sets mostly for the face brushes, go for it! If you want the specialty eye brushes, save up for the full size. This makes the most sense too because the face brushes are more expensive and a better value to get the kits, and the specialty eye brushes are cheaper so you don't feel as bad buying the full size ones. 

What do you think?

Friday, July 23, 2010

Bobbi Brown Brush Set - 68% off!! Nordstrom Exclusive

UPDATE!! I did indeed get the brush set I talked about below, and I took a quick pic for you my lovely readers. The brushes are (top to bottom):
  • Eye Shader 
  • Eye Shadow
  • Face Blender
  • Ultra Fine Eye Liner
  • Eye Brow
  • Concealer
I am really loving the quality of these brushes as they work really well and the bristles are incredibly soft! Check them out for yourself.


I saw this an amazing deal and just had to tell you guys!! Right now Nordstrom is having an exclusive deal on a Bobbi Brown brush set. The set includes 6 (yes, 6!!) Bobbi Brown Full Size brushes for $75!! If you were to buy these brushes individually it would cost you $178!!! That is 68% off!!

The set includes Bobbi's famous Face Blender brush, Eye Shader Brush, and several other very useful brushes. I don't have a pic or anything, but the set is not being advertised or sold online, only in stores. The stores will ship to you if you don't have a Nordstrom store, but call now if you are interested. The set is part of the Nordstrom Anniversary sale that started last Friday, and I am sure these will sell out fast, if they haven't already!

Oh and I know I haven't done a review yet (hopefully soon), but Bobbi's brushes are AMAZING quality! They are super soft (among the softest bristles of any brand I've tried), work wonderfully, and they are made so well they last and last, no matter how often you wash them!

Wednesday, July 21, 2010

Parian Spirit Brush Cleaner Review

At IMATS, I picked up the Parian Spirit Brush Cleaner. This high performance brush cleanser is targeted towards makeup artists, but I think it is the best brush cleanser for makeup newbies and pros alike. I got a large bottle of the cleanser (not pictured) , a small travel size spray bottle, a few handy cleanser wipes, and the cleansing tub:


The formula of the cleanser itself is amazing. It cleans and disinfects in a matter of a couple minutes, and it contains alcohol so the brushes dry very quickly and can be used almost immediately after cleansing. Here is the pamphlet that explains more about the cleanser and the recommended methods for cleaning and disinfecting brushes. If you click on the image below you can view a larger, more readable version.


The mini spray bottle is great for on the go, because you can spray the cleanser directly on the brushes and wipe them clean. The wipes are also handy as you can simply swipe your brushes across the wipe. However, the method that is most effective and recommended is using the cleansing tub. The tub is like a jar and it comes empty without any solution. It has a ring at the bottom with a plastic grate on top. The idea behind this is that the grate is raised about half a centimeter above the bottom of the jar, and when you clean your brush in the jar, makeup and dirt are removed from the brush, fall below the grate, and settle to the bottom. That way, the fluid above the grate is still clean and can be used to clean more brushes. This is the jar empty:


After pouring in some solution (I usually pour enough so there is a centimeter of cleanser above the grate), simply take a dirty brush and dip it in the solution for a couple minutes. Swish the bristles around and rub them against the grate to help loosen makeup particles. 


In a matter of seconds the brush is clean:

Saturday, March 27, 2010

My Favorite Crease Brushes

Crease brushes are something I absolutely cannot live without. I use them for just about everything! I could probably use only crease brushes for an entire makeup application, except that foundation and powder would take for-eee-ver.

Here are a few of my favorites:


1 - Stila #9 brush - This is very similar to the MAC 224, but the bristles are just a tad longer. It is also very fluffy so it is great for blending out colors on the eyelid or browbone. The handle is a bit longer than the MAC 224 but doesn't make much of a difference to me.

2 - MAC 224 - This is the classic crease and blending brush that so many people recommend. It can be a bit too big and dense for a precise crease application, but is still great for blending colors, especially for a neutral eye. I also like keeping a couple clean (w/ no color) ones for clean up or blending out edges. Overall, this is a brush that everyone needs and I highly recommend.

3 - MAC 222 - This is a great brush for applying color to the crease. The brush head is narrower than the MAC 224 so you can get a precise application of color. The bristles are longer than the MAC 224 but I don't find that as an inconvenience. (Have you noticed I compare everything to the 224....tells you how much I love that brush!!) The one thing I don't like about this brush is that the bristles are white. I do clean my brushes well, but I don't like how dirty white brushes look and how easily they can get stained.

4 - This is a Sephora crease brush from the Platinum Brush Collection. I really really really like this one. It is the perfect amount of denseness and fullness for both a precise color application and also for blending. The height of the bristles is perfect, the bristles are colored and not white, and I do like the shape of the handle because it is easy on the hands.

5 - MAC 226 - Another great one from MAC that I think everyone needs to have. Unfortunately this is a limited edition brush, but has been released a couple times and I hope they make it permanent. The pointy brush head makes it great for really defining the crease and highlighting the inner corner of the eye, but the bristles at the base of the brush are full so you can get a pretty good blend. This is a must-have in my book.

In addition to applying eye color, I love using crease brushes for applying concealer to the under eye area. I find that concealer brushes are sometimes too rigid and can tug at the skin a bit. Crease brushes, especially like the MAC 226, fit perfectly in the inner eye area and are great for blending, without tugging at the delicate skin under the eye. I also love crease brushes for cleaning up or softening up edges of color.

What are your favorite crease brushes?

Tuesday, March 9, 2010

Highlighting Part 3 - Best Brushes for Highlighting the Face

In the last couple weeks I told you about some of my favorite highlighters, then highlighting techniques, and now in the last part of my highlighting series, I am going to tell you about some of my favorite brushes for highlighting:


Before I get started, this is not an end-all be-all of what you can use to highlight, these are just the brushes I tend to reach for. And yes, I use mostly MAC, but feel free to use whatever you have or want.


This first one is the MAC 138. I really love this brush for powder because the pointed tip really gets into small areas like under the eyes and around the nose. However, this brush is also great for highlighting. It doesn't pick up too much color so it is easy to control the amount of product you apply and you won't end up looking glittery. Because of the tapered shape, I like to roll half the bristles once in a powder highlighter and then roll it against the skin. This technique is best for highlighting above the cheekbones and the temples. This is a larger brush and can be used for highlighting smaller areas like the nose, but it takes a little more control and practice so you don't get the highlight product all over the place.


This next brush is the MAC 165 and is like a smaller version of the MAC 138. I belive this was a limited edition brush, but it seems like MAC releases it about once a year with a limtied collection. You can use this brush in a similar manner as described for the 138 or you can use to to just sweep the product on the skin. It has shorter bristles and the diameter is smaller, so you don't have to worry about getting the product all over the place. This brush works great for both powder and emollient based products.


This next brush has so many great uses and I think everyone should have one. It is the MAC 188, or a skunk brush. This is a smaller version of the MAC 187. Because of the duo-fibers, this brush always picks up the perfect amount of product and allows you to blend flawlessly into the skin. I either brush this against powder highlighters and apply to the skin, or apply cream/liquid highlighters with my fingers, and use this brush to blend the product into the skin. This is great especially for beginners because it does not pick up too much product, and is great for everywhere, because it has so many uses. In addition to highlighting, I use this for cream or powder blushes and sometimes for foundation.


This next one is a brush I constantly rave about and is the MAC 109. I used this for EVERYTHING. I especially love it for liquid foundation, powders, and for contouring. However, I do use it for highlighting the cheekbones too. It has densely packed bristles so you have to be cautious with powder highlighters, because you can pick up too much product. In a hurry, I will swipe this on a powder product, them apply to the cheekbones, and take whatever is remaining on the bristles and swipe against the bridge of the nose. Again, less is more with highlighters, and you don't want to be the white version of Rudolph.


Lastly, I use crease brushes for detailed highlighting, like under the browbone, the chin, and the cupids bow, but I really like using them for the temples. The one pictured here is one of my new favorites, the Stila #9 brush. I typically use this with a loose powder highlighter, but you have to be careful not to pick up too much product. Since it is smaller than all the other brushes, you have more precise control of where to apply the product. Crease brushes are also great for blending, and give a nice soft look.

Overall, highlighting takes a bit of practice and is easily a step that can be skipped for daily makeup application, but really adds a nice touch for special occasions, especially if you are going out in the evening or will be in dimly-lit spaces. Based on the curvatures of your face, figure out what looks best on you and have fun with it!

Monday, February 22, 2010

How to Highlight Your Face - Tutorial, Tips, and Tricks

Last week I told you about a couple of my favorite highlighters here. As promised, here is a tutorial on how to highlight your face. Highlighting is used to draw attention to areas of the phase that you want to emphasize and bring out. Most highlighters are a vanilla, white, silver, or gold color, that can easily blend into the skin tone. Many highlight products can sometimes be too glittery, so when choosing a highlight, aim for something that blends into the skin but gives off a nice healthy sheen. Highlights should not be obvious, but they should enhance. On the other hand, contouring de-emphasizes areas of the phase you do not want to draw attention to. Highlighting and contouring are methods of adding angles to the planes of the phase, creating visual interest, and allowing you to create more definition to some areas of the face.

#1: The first place that most people highlight regularly, and probably don't think of as "highlighting" is when you add a highlight color to the eye area. 


You can simply apply the product to the browbone and blend so it does not look white or garish. In the diagram above, I did not indicate it, but highlighting the inner corner of the eye (the tearduct) is a great way to add brightness to your eyes and helps close set eyes look a little more balanced. 

#2: Higlighting the temples and above cheekbones


Highlighting above the cheekbones (blue drawing above) is probably the second most common area to highlight. Adding a highlight here creates the illusion of higher cheekbones and gives a nice glow. Usually I apply my blush first on the apples of the cheeks, and then add my highlight right above the blush, above the cheekbones. I usually follow this step by highlighting the temples (purple drawing above). Let me tell ya, this might seem insignificant but it looks sooooo good! You want to create a "c" shape around the eye. This should be subtle and glowy. If you can see it on, you probably have too much product on. The highlight should just catch the light, so if you are looking in the mirror and turn your face, you should see the light reflecting on the highlighted area. This looks great especially on all skin tones and just adds an extra special touch, especially if you are going out to a party or a wedding. 

#3: Higlighting around the mouth


This is something I don't do very often on myself, but I like the effect. Highlighting the cupid's bow (above the mouth) is very flattering and really emphasizes the lips. You don't want to put too much product on, just a tiny dot in the middle of the cupid's bow, and blend outwards on each side. You can also highlight the chin area, especially if your chin and cheeks are in the same plane and you want to add more angles to your jawbone and chin area. 

#4: Higlighting the nose


#4: I really love the effect of highlighting the nose, but you want to be sure you don't look like Rudolph, but with a white nose. The product should be applied at the end of the nose and blended upwards on the bridge of the nose. This really adds a nice glow, but you want to be careful, because if you have an oily T-zone, you don't want to be glowing like a lightbulb. 

When highlighting, be cautious of your face and your skin type. If you have oily skin, highlighting certain areas like the nose and chin can make you look greasier, and worsen your appearance. Practice a few times and you will get the hang of it. Like with all makeup applications practice makes perfect. I recommend that you try these techniques with a friend around, so you can apply the highlight and if you can't tell whether you have too much or too little on, your friend should be able to tell if you look sparkly or natural. Highlights should allow the light to bounce off your face, but not in an over the top way...just naturally...like you have model-esque skin. 

Stay tuned, as I will soon be doing a post on my favorite brushes for highlighting. Till then, hope you all are doing well and enjoying what is hopefully the last few weeks of winter!

Thursday, September 17, 2009

Gasp!! A dud from Urban Decay

I have been so pleased with Urban Decay since I discovered their 24/7 pencils a year ago. I decided to try out a bunch of new stuff during the recent friends and family sale and am finally able to report back on my thoughts. To my utter shock, there is actually a product that will sit in the bottom of my makeup box for all of eternity....

I figured the color products are so awesome that their brushes must be good too, especially since they are made of completely synthetic hair and are 100% animal friendly. Ok, so in the interest of beauty, I typically don't care tooooo much about this fact, buuuut, I do like to purchase animal/environmental-ly friendly products whenever possible.

Thus, I picked up the Good Karma Blush Brush:
For your viewing pleasure, a close up of the brush bristles:

It looks cute and slick, and I really like the color of the bristles. However, they just didn't perform for me. The bristles did not have any grab - meaning they were not able to pick up any color. I had to swipe the brush several times to grab the color and even if it did, the color stuck to the bristles and did not deposit on my face! My fellow beauty friends, save your moola and do not get this brush. However, since I do love Urban Decay so much, I say take that money and spend it on some shadows, primers, or liners from the brand...as they truly are freakin awesome!


LinkWithin

Related Posts with Thumbnails